Censys Add-on for Splunk#
The Censys Add-on for Splunk allows Censys ASM users to import Logbook and Risks data into Splunk®, where changes in their attack surface can be easily directed to downstream security and analytics applications.
This guide will help you:
Install the Censys Add-on in your Splunk environment
Configure the Censys Add-on
Use the Censys Add-on to monitor your attack surface
Splunkbase: Censys Add-on for Splunk
Add-on Prerequisites#
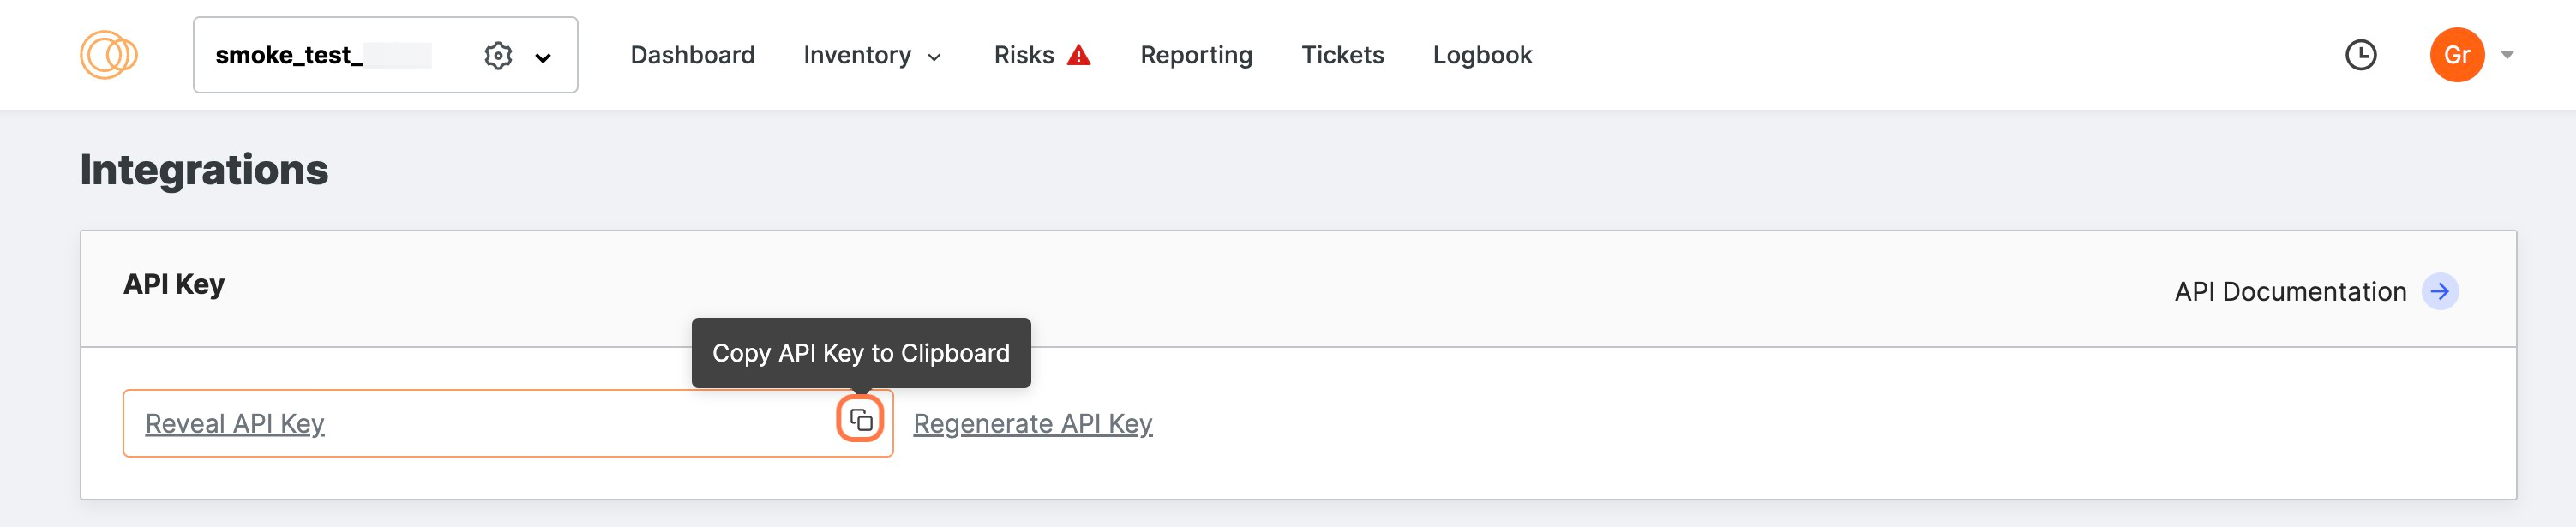
Your Censys ASM API key
Find your key on the Censys ASM integrations page.
A Splunk account and installation.
Install the Censys Add-on for Splunk#
Install from Splunkbase (Recommended)#
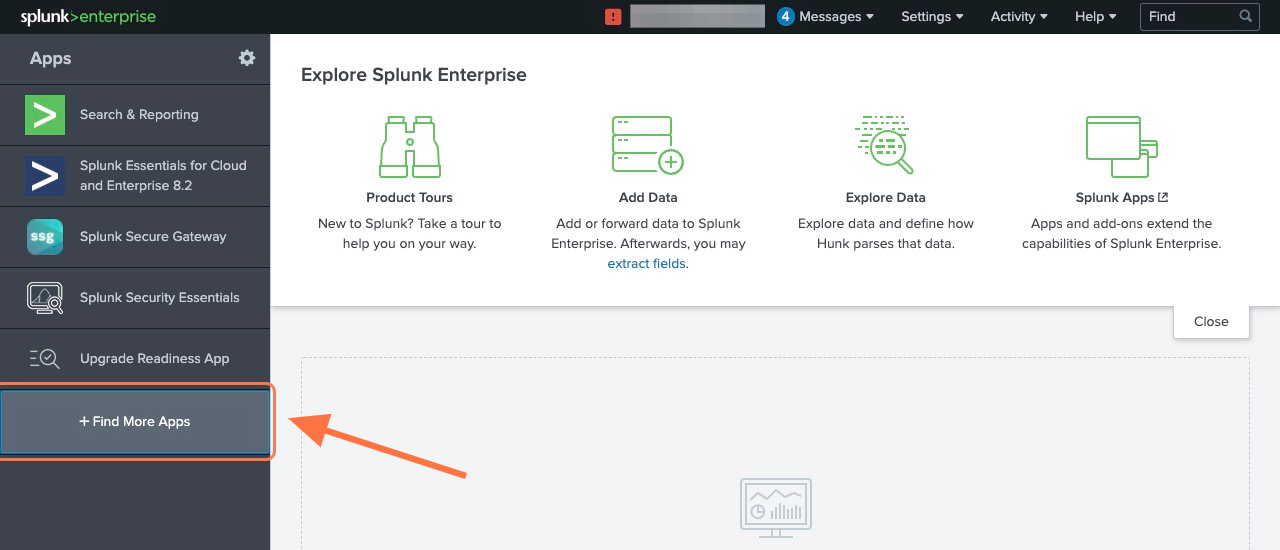
From the Splunk main page, click the + Find More Apps button in the sidebar.
Type “Censys” in the search bar.
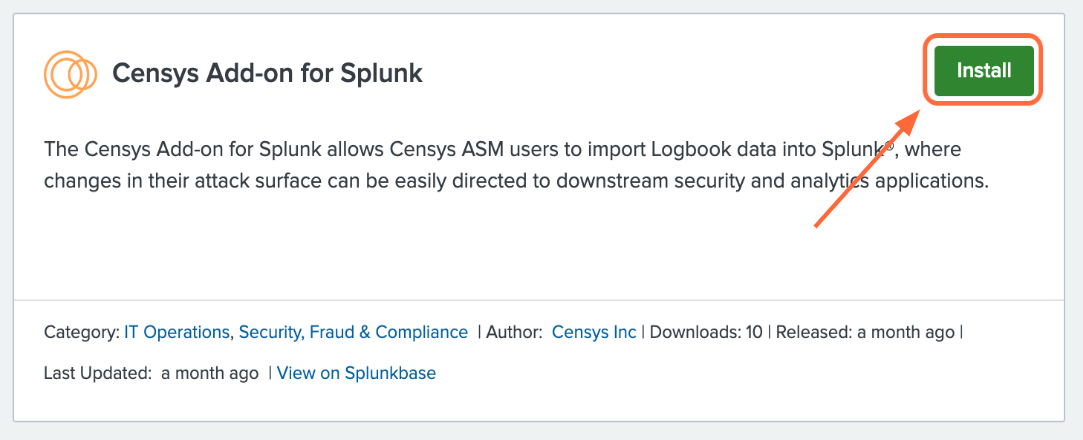
On the results page, find the “Censys Add-on for Splunk” app card and click the green Install button.
Reenter login credentials to confirm your choice.
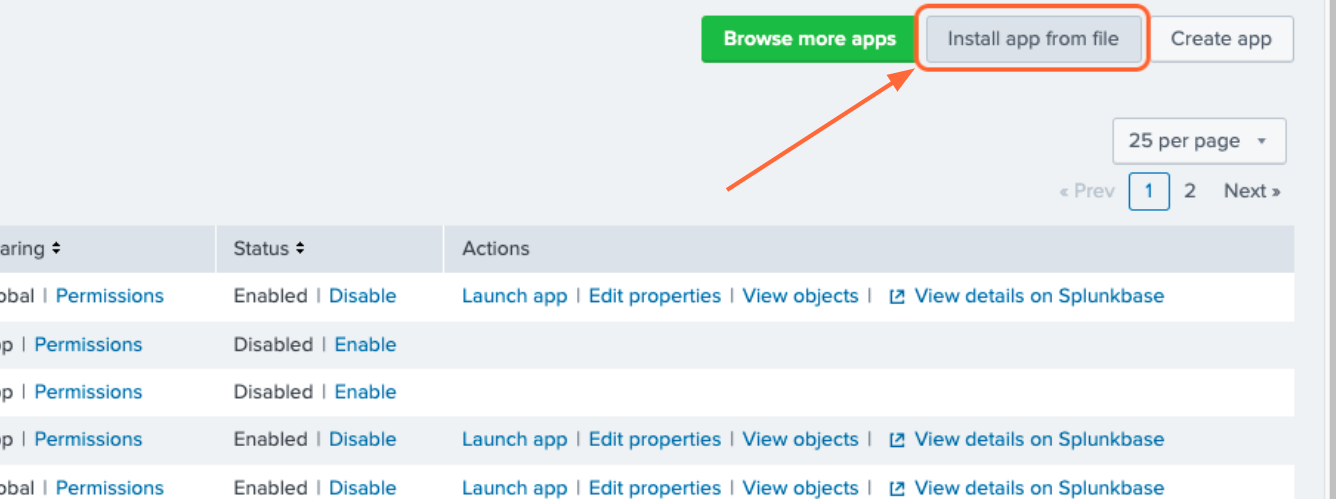
Install from File#
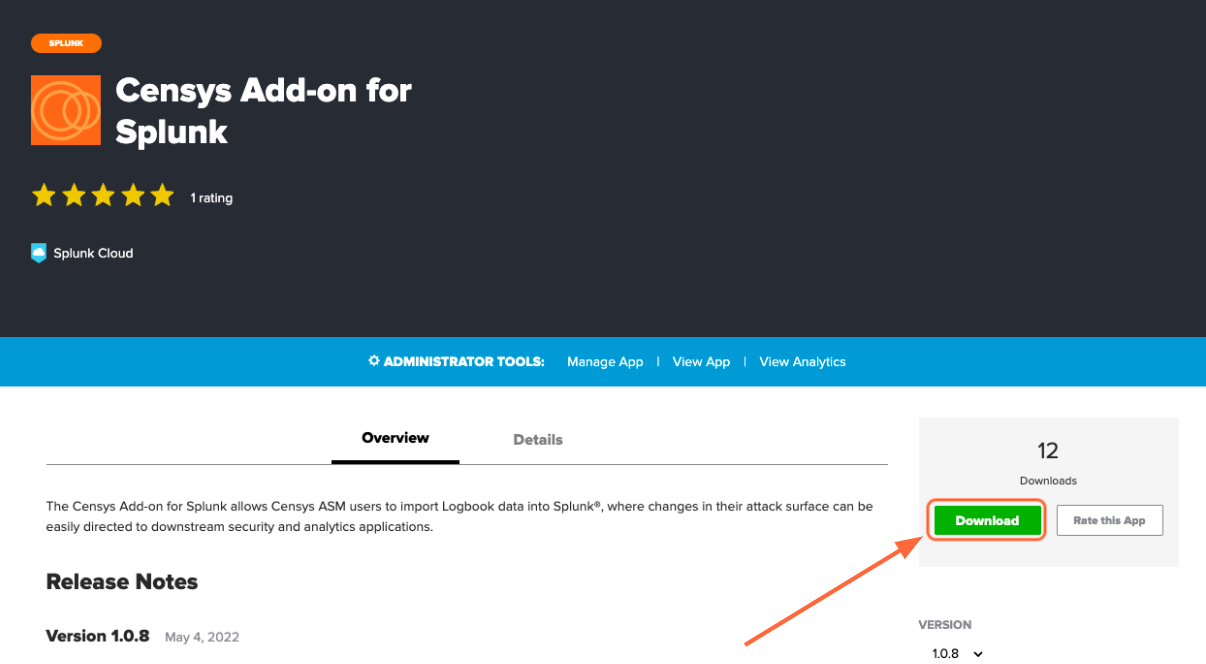
Go to the Add-on’s page on Splunkbase and click the Download button.
From the Splunk Web main page, click the gear icon next to Apps, then click Install app from file.
Configure the Add-on#
Global Settings#
If you will be using the same Censys workspace for all Splunk work, you can enter your Censys ASM API key in one place, rather than for each input.
Click on the Configuration tab at the top of the page
Under the Accounts tab, you will see all of your configured accounts. Click “Add” to configure a new account.
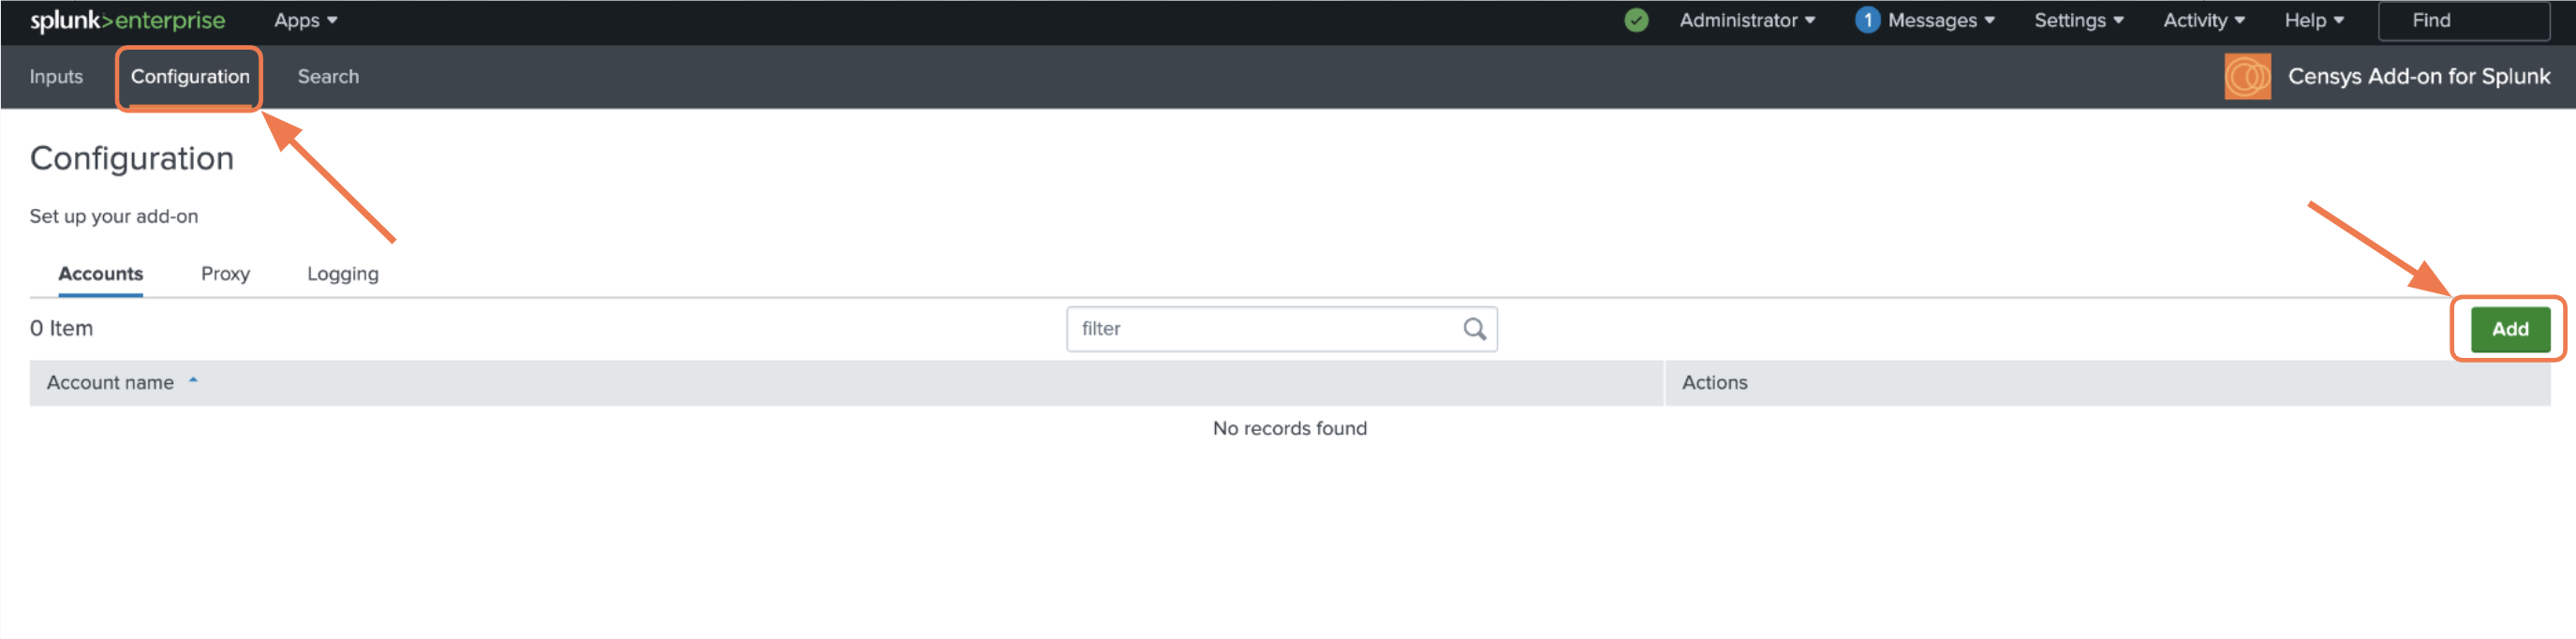
Enter a name for this account (the name of your ASM workspace is a good choice) and enter your Censys ASM API key (check out Add-on Prerequisites for help finding this)

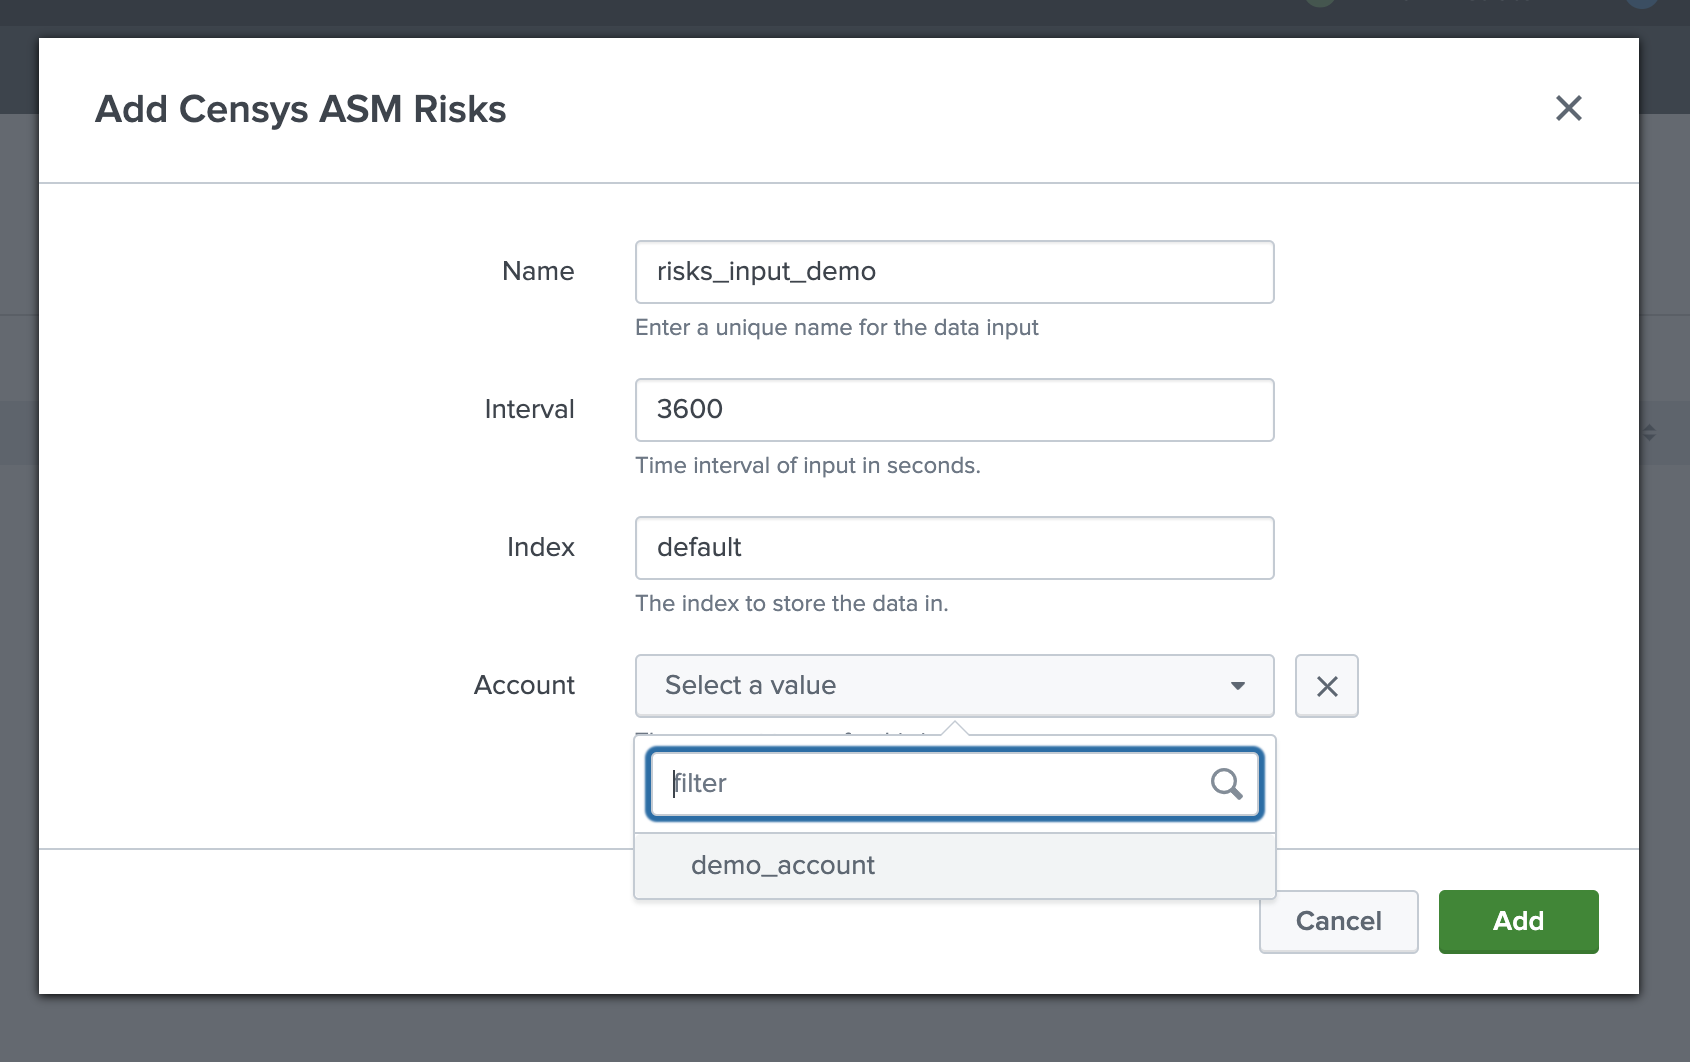
Inputs#
From the Inputs page, select Create New Input. Select the API you would like to pull from.
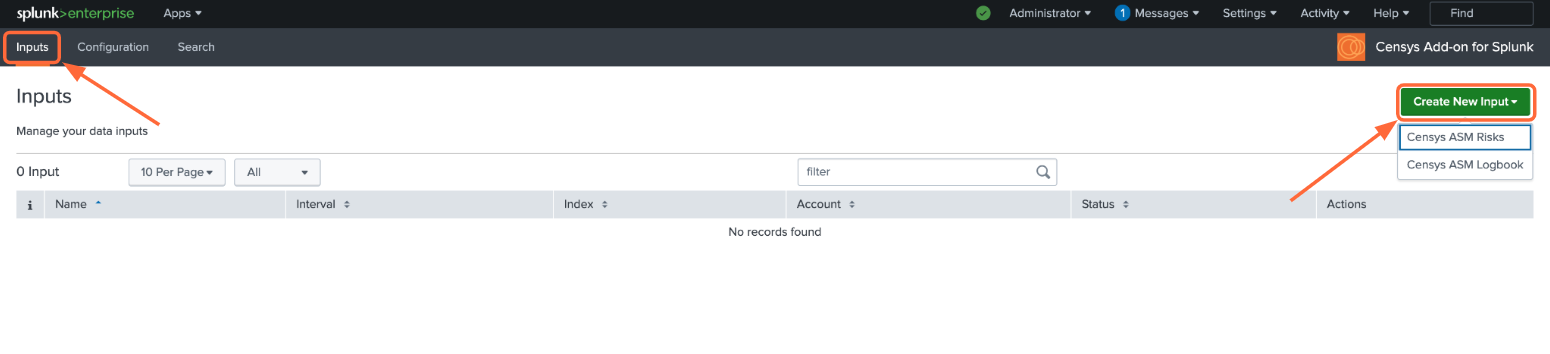
Fill out the following fields:
Input Name (required): A name for the input
Interval (in seconds): How often the input should run (default is 3600 seconds, or 1 hour)
Index: The index where the data will be stored
Account: The Censys account to use (if you have multiple accounts)
See also
For more information on logbook events, visit our Logbook Event Catalog.
Use the Add-on#
Download our Censys ASM App for Splunk!
Under the Search tab, you can enter queries on your data inputs. If you are not familiar with Splunk search syntax, Splunk has the following helpful resources:
ASM search commands#
Two search commands pull live data from the Censys ASM API: censysasmrisktypes and censysasmriskinstances. They require your ASM API key to be configured in the add-on (see Configure the Add-on).
censysasmrisktypes#
Returns the list of risk types defined in your ASM workspace (e.g. open ports, vulnerable software). Use it to see available risk types or to join/lookup with other data.
Syntax
| censysasmrisktypes
Examples
| censysasmrisktypes

| censysasmrisktypes | spath | table id, name, description, defaultSeverity
censysasmriskinstances#
Returns the current risk instances from ASM (each instance is a specific finding, e.g. a host with an open port or a vulnerability). Use it to get up-to-date risk data or to enrich risk events (e.g. censys:asm:risks) with severity and display name.
Syntax
| censysasmriskinstances
Examples
| censysasmriskinstances

| censysasmriskinstances | spath | table id, displayName, severity, status
Enriching risk events with risk instances#
To enrich risk events with fields from the risk instances lookup:
Populate the lookup using either approach:
Option A: Enable the cron job for Generate Risk Instances Lookup in
savedsearches.conf(under[Generate Risk Instances Lookup]): setdisabled = 0andenableSched = 1. The default schedule iscron_schedule = 0 * * * *(every hour at minute 0). After editing, restart Splunk or reload the app. You can also enable or edit the schedule from Settings → Searches, reports, and alerts in Splunk Web.Option B: Run the lookup manually in the Search tab:
| censysasmriskinstances | spath | rename context.ip as ip, context.name as name, context.port as port, context.transport as transport, context.type as type, lastUpdatedAt as updatedAt, categories{}{} as categories | eval accepted=case(userStatus=="muted", "true") | fillnull value=false accepted | table id, displayName, severity, status, typeID, ip, name, port, type, updatedAt, categories, accepted | outputlookup asm_risk_instances_lookup

Enrich risk events with a lookup like this:
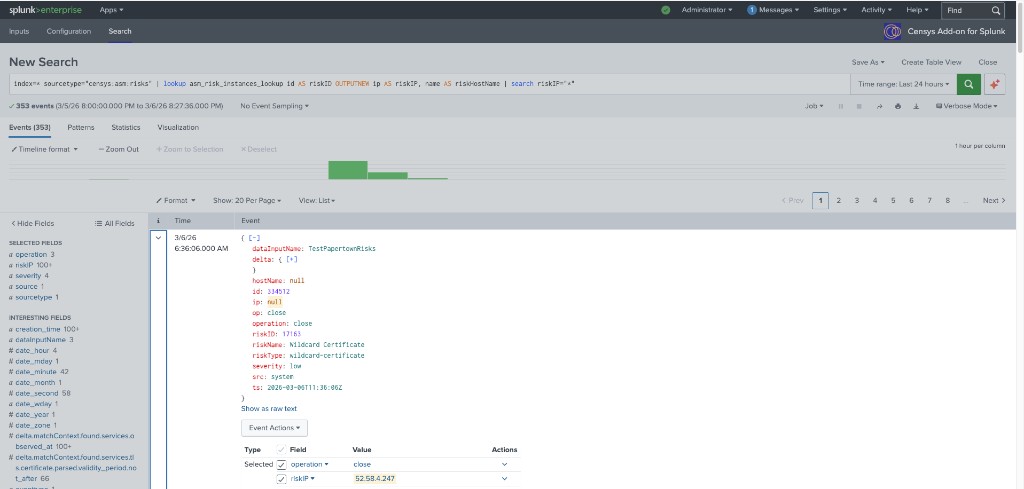
index=* sourcetype="censys:asm:risks" | lookup asm_risk_instances_lookup id AS riskID OUTPUTNEW ip AS riskIP, name AS riskHostName | search riskIP="*"
You may need to expand an event in the results (click the event row) to see the added fields such as riskIP and riskHostName in the event details.
FAQs#
What if I’m seeing no events in my index?#
Confirm your Censys ASM API key is up to date
Confirm your index is accessible